
DIY Your Own Pressed Flower Luminaries
Many of us gardeners crave long days of warm sunshine and the thrill of new growth in spring—two things that can feel far away during the depths of winter. What can we do to mute those winter blues?
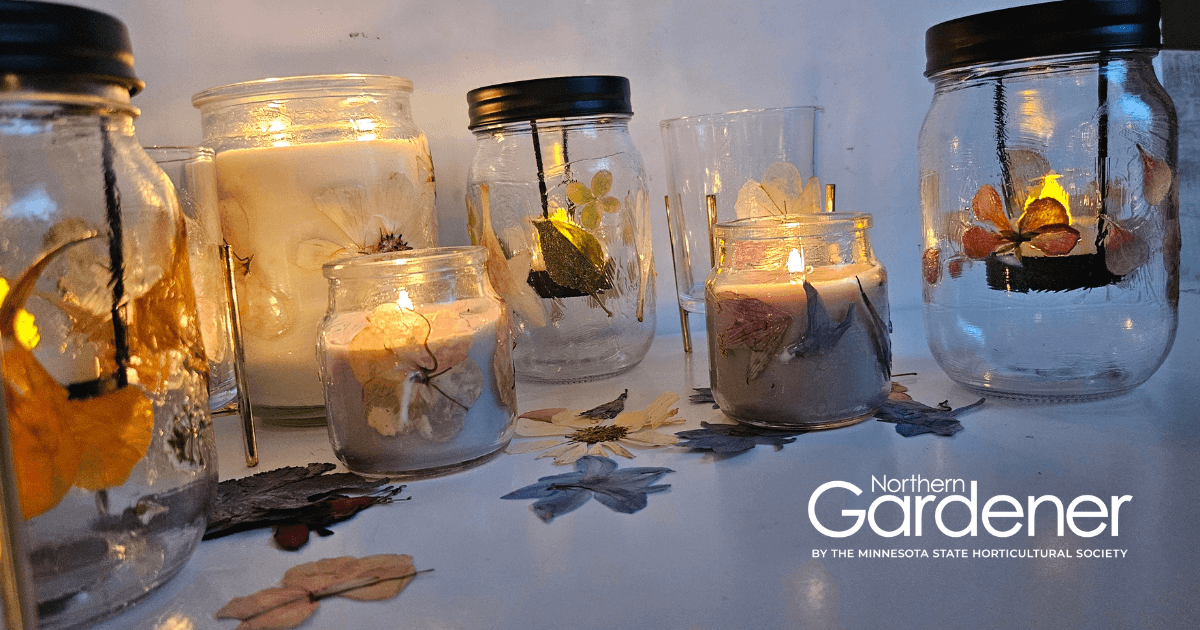
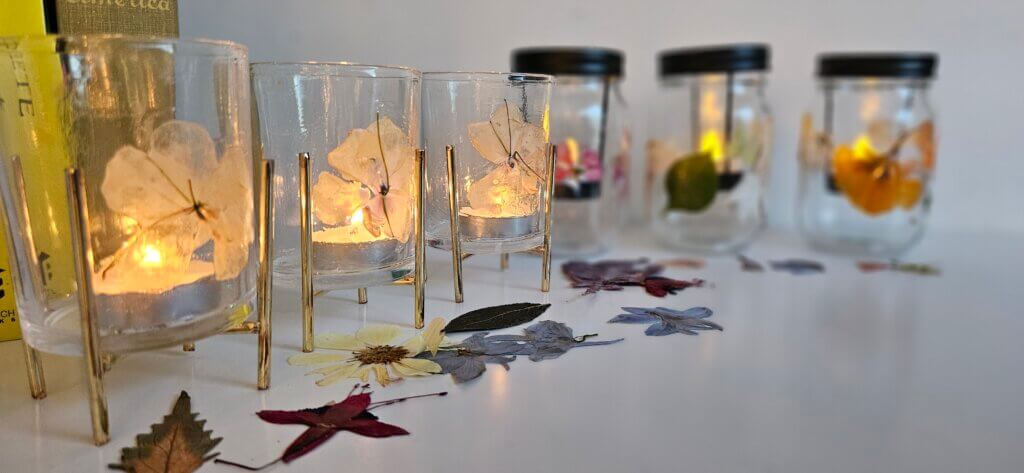
I like to stay active, get creative and have fun digging into nature-centered, plant-related activities. One of my favorites? I sprinkle my porch and patio with sweet, flower-laden luminaries to light up wintertime walkways and window views outside and dining and coffee tables and nightstands inside. These fun, floral lanterns are fun and easy to create and also make thoughtful gifts.
How to make pressed flower luminaries
Twinkling lights and beautiful flowers will mute those winter blues. Light up long, dark winter nights with garden dreams and pressed flower luminaries. Pull out any pressed flowers you might have set aside this summer (see below to make your own or order some online).
Another great option is to use old seed catalog clippings or even seed packets and cut out images to use on your luminaries.
INGREDIENTS
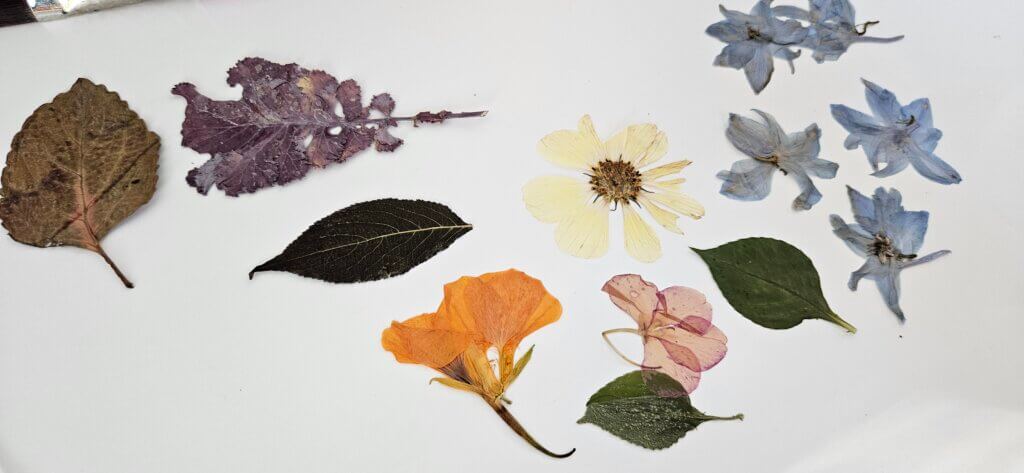
- Pressed flowers (from your garden, online or the store)—must be flat to properly apply to glass
- 3 to 5 clear, matte glass candles with wax, or candle holders
- 1 package tea lights, either flame or battery
- 1 container Mod Podge (gloss or preferred finish)
- 1 paintbrush
HOW TO MAKE
Play with pressed flowers and leaves, arranging them in your desired design. With paintbrush, apply a thick coat of Mod Podge to the exterior of the glass where you will stick flowers and leaves. Place flowers on the glass and then apply a thick topcoat of Mod Podge over flowers and leaves to seal and adhere them to the exterior of the glass. Repeat until desired design is achieved. Allow to dry completely. Light or turn on candles and enjoy!
Need pressed flowers? Here’s how to make your own
Visit your local supermarket or floral shop to purchase a bouquet of flowers and a roll of wax paper (parchment works, too). Head home to find your heaviest, thickest books. Separate the flower stems and cut them apart, snipping off heads, petals, leaves and any other bits you love.
Place a single layer of flowers and foliage between two sheets of wax paper and then sandwich them between the pages of a heavy book. Repeat as many times as you like. Carefully close the book and add even more hefty books on top for additional weight.
Let the flowers sit and squish for at least two weeks so they have time to dry and flatten completely. Carefully slip pressed flowers and store in a cool, dry place for future projects.

Jamie Miller has been a Hennepin County Master Gardener since 2023.
You may be interested in:
DIY: Making Sunprints
Sunprints are a fun and easy way to make your own garden art, and the results are bold and beautiful pieces worthy of decorating your…
Lavender Lab DIY Projects
Lavender has a way of stopping you in your tracks. Its calming fragrance, silvery foliage and dreamy purple blooms bring a touch of the Mediterranean…
Hot Off the Press: Simple Flower Arranging
Simple Flower Arranging by Mark Welford and Stephen Wicks (DK Publishing, 2014) This visually stunning book is a piece of art itself, but you won’t…