
Sew Your Own Grow Bag

Gardeners always seem to be looking for new ways to grow plants:
- Container gardening- from house plants to tomatoes grown in pots (https://www.almanac.com/content/container-gardening-vegetables).
- Bucket gardening-growing vegetables in 4 or 5 gallon buckets positioned over a gravity-fed watering system (https://www.srperspective.com/post/holy-buckets).
- Straw bale gardening- after a fertilizer application begins the decomposition of the bale, plants are grown directly in the straw (https://strawbalegardens.com/).
- Soil bag gardening: slashing a bag filled with soil and planting in the bag (https://www.gardeningknowhow.com/garden-how-to/info/planting-in-soil-bags.htm).
Have some leftover fabric or denim?
If your DIY juices are flowing and you’re up for trying something new, how about felt bag gardening or, if you’re into recycling, denim bag gardening?
- Bags made of any kind of fabric drain water through the fibers which means you’ll need to position them on an impervious surface, place them on the ground, or with a tray or plate underneath.
- Because the sides are open to the air, the soil will dry more quickly requiring more frequent watering.
- The bags are easily transportable or moveable for repositioning.
- The fibers of the fabric are close enough that soil shouldn’t leak out.
- Over time the bags, if made from natural fibers, will themselves be reusable or recyclable.
At $10-$12 per yard, durable felt will make sturdy bags that should last for several years. Search for “DIY felt grow bags” on YouTube for a tutorial on sewing bags from felt squares.
Sewing your own denim grow bag
If you have old denim jeans just waiting for a new life, follow the simple instruction below to make grow bags that cost nothing. If you don’t have a sewing machine, you can use needle and thread and simple stitches.
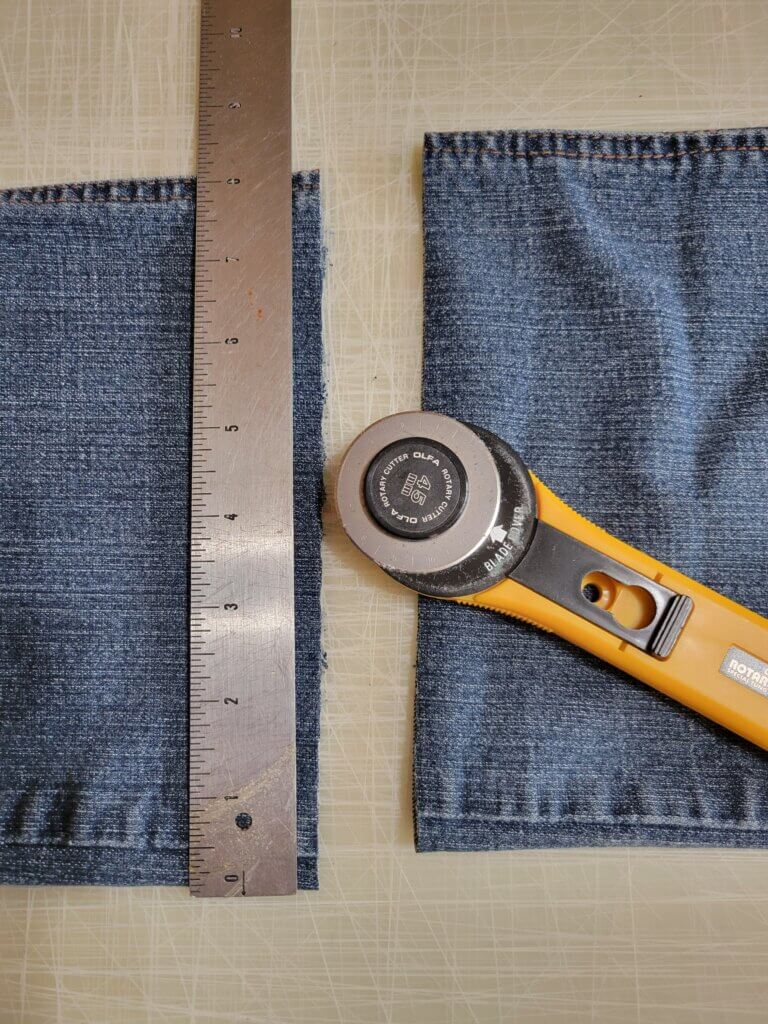
Obviously, you can make two bags from a pair of jeans. Cut about 9” from the bottom of each leg. The hem will become the top of the bag and may be folded down to adjust the finished height of the bag.
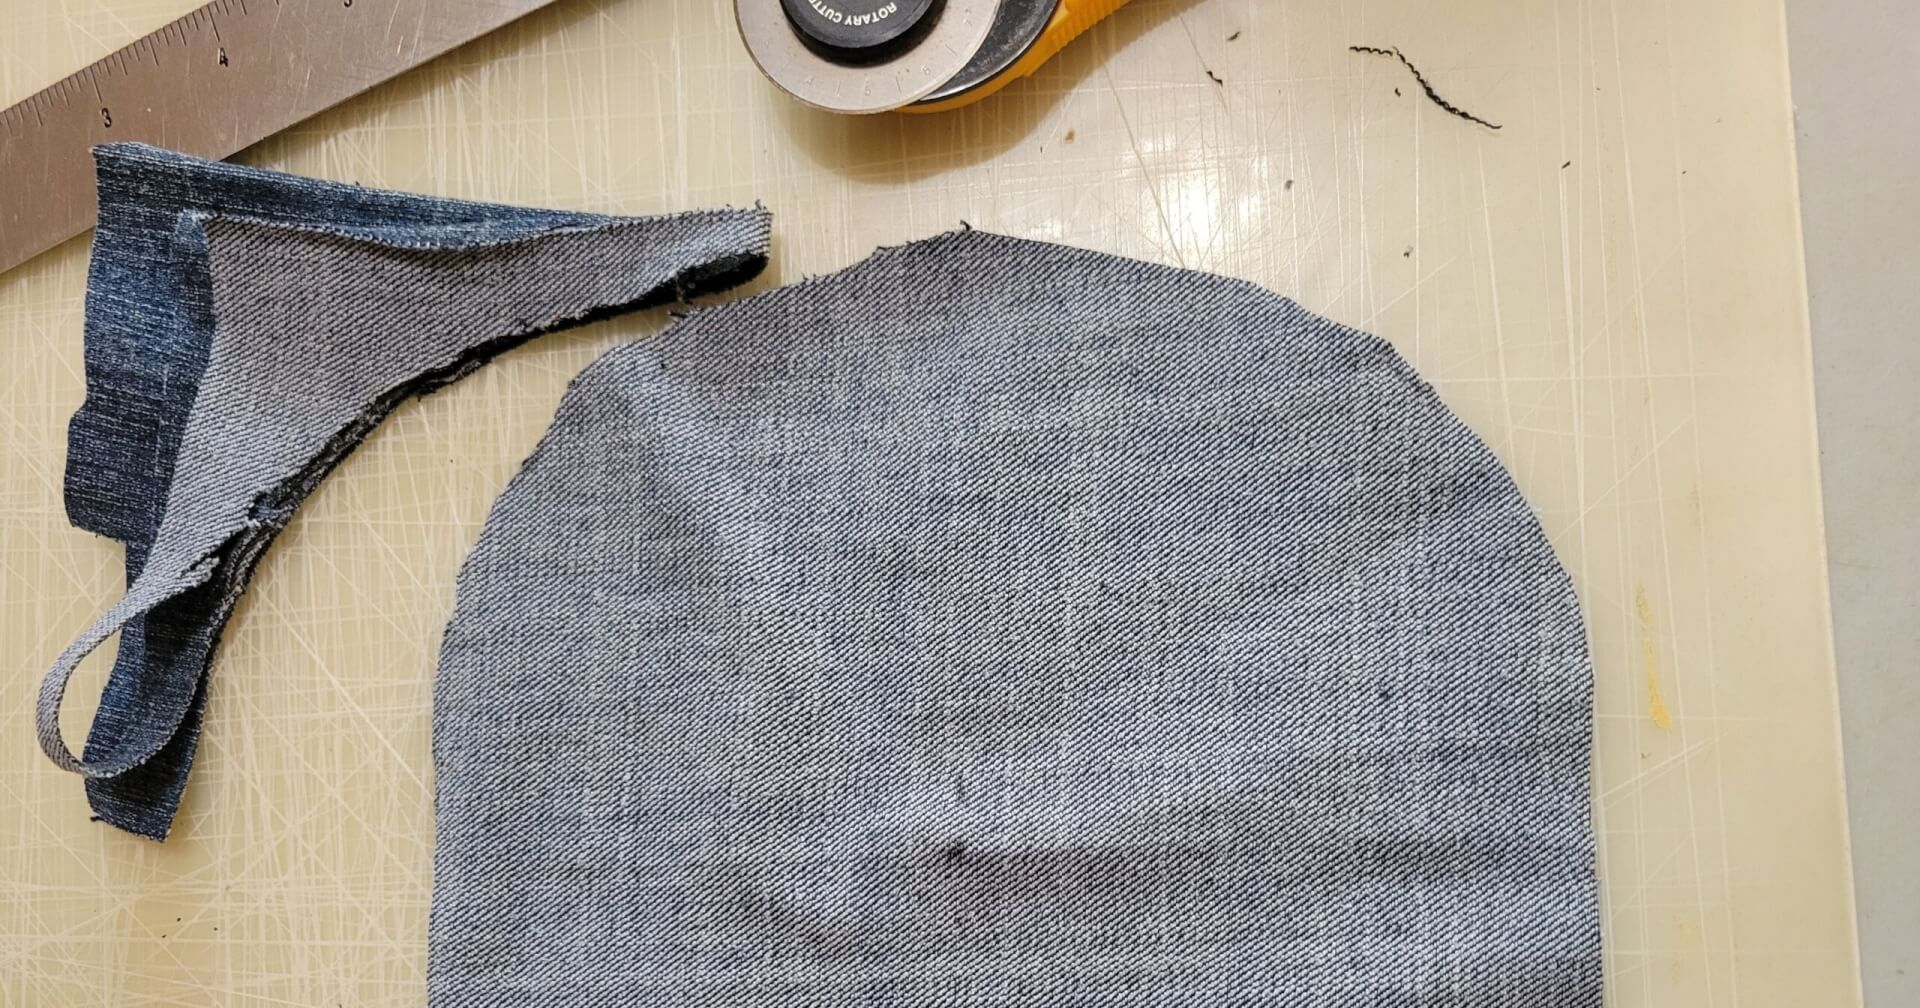
For the bottom of the bag, cut a circle with a diameter the same measurement as the width of the leg. My jeans were 8” across so I cut a circle with an 8” diameter from another piece of the upper pant leg. To create a simple circle, mark the center of the fabric piece and an arc of marks 4 inches from that center for about ¼ of the circle. Fold the fabric piece in quarters with those marks showing on the top quarter and the center mark at the point of the folds. Using a rotary cutter or scissors, cut along the arc of marks. Unfold, and voila´, you have a circle.
To gather the edge of the circle, sew 1/2” from the edge of the circle using a long stitch. Sew again ¼” from the edge. Pull up the stitches to make a simple “cup.”
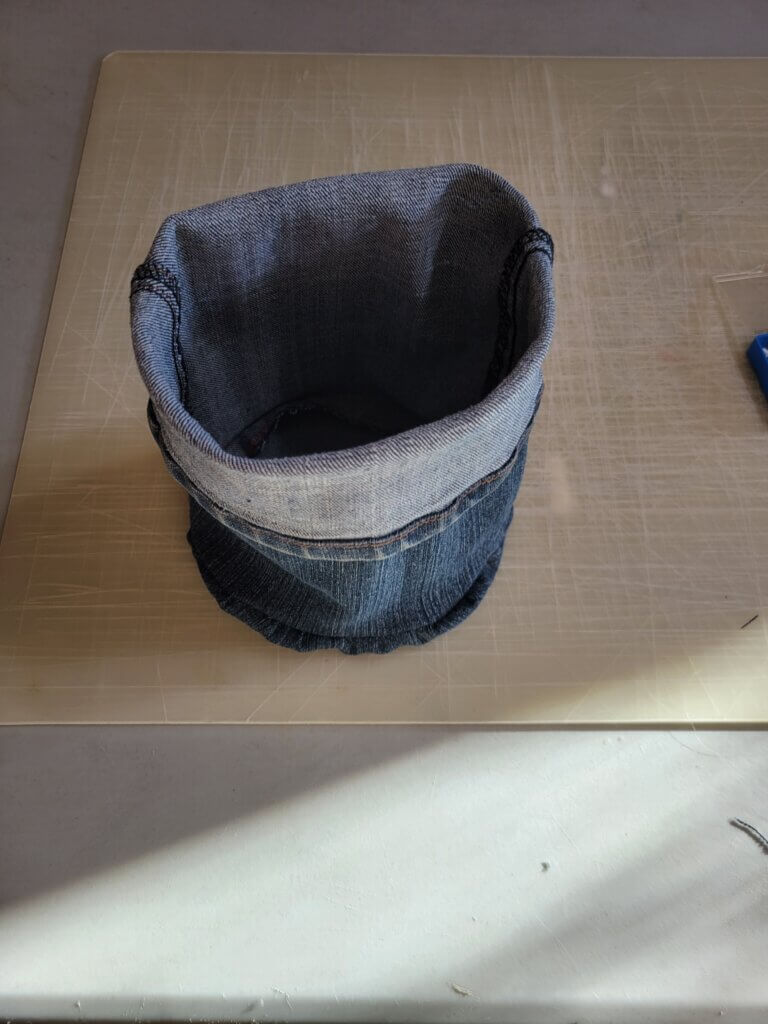
Turn the bottom on the pant leg inside out. With right sides together, position the “cup” inside the leg, matching raw edges and adjusting the gathering stitches to fit. Pin. Sew ½” from the edge. Check to be sure you’ve made a good seam. Then zigzag the raw edge for additional strength.
Turn right side out and your bag is done. Fold down the top to adjust the height. If you want handles, cut the belt loops from the waistband of your jeans and apply to the sides.
Repeat with the second leg and you’ve spent about an hour making useful grow bags from jeans that were ready for the rag bag. It goes without saying that this style of bag may be made from other fabrics. Consider: burlap, upholstery fabric, brocades and other durable fabrics, vinyl, leather, suede, and other decor accent fabrics.
Nancy Packard Leasman is a columnist, artist and gardener who maintains 40 acres in central Minnesota.
You may be interested in:
Book Review: Why Grow THAT, When You Can Grow This
Some plants are like the popular kids in high school, says garden designer Andrew Keys in his new book, Why Grow THAT When You Can…
Growing Microgreens at Home
Easy steps and resources for growing microgreens inside your home.
DIY Felt Grow Bags for Container Gardening
Try making your own, custom-sized flower or vegetable container out of a few inexpensive items. By doing it yourself (DIY), you can save money and have a convenient planting container with these step-by-step instructions, plus a video tutorial.