

Building a Raised Bed with Legs
The previous post discussed a couple of ways to build a basic raised bed garden, for your deck or on the ground. In this post, we’ll talk about how to build a raised bed with legs. If you are considering building a standing raised bed, keep reading until the end of this post, where we share videos of a variety of plans for different building skill levels.
More and more people are looking for raised beds on legs because it’s easier to reach into a raised garden, especially if you have back or knee issues. It’s also a great way to keep rabbits out of your herbs or lettuce. And, they just look attractive, especially on a patio or deck. You can buy a raised bed on legs from a variety of sources. The best ones seem to cost between $150 and $250 each and can go higher. You can build one for much less, though it’s not quite as simple as building a basic raised bed.
It’s All in the Legs
Raised beds on legs seem to fall into two styles, based on the style of leg. Some DIYers use two boards (1-by-4s, for example) to form a V-shape and then attach the side panels of the box inside the V-shaped legs. The legs give the bed a more finished look. The other type involves using a sturdy post, such as a 4-by-4 or a 2-by-3, in each corner and building the box around it. Some folks create a frame that’s attached to the posts while others just attach the side boards to the posts.
What the bottom of the box is made of also varies. Several builders recommend adding a few cross boards on the bottom and then attaching quarter-inch hardware cloth to the bottom. On top of that, landscape fabric is installed. Others use wood for the bottom, which is heavier but sturdier and less likely to rupture.
Building a Standing Box
I want to add two raised beds on legs to my patio for looks as well as rabbit protection. My building skill level is low to moderate and I do not have a ton of power tools, but I’ve built enough boxes to know roughly how to do it.
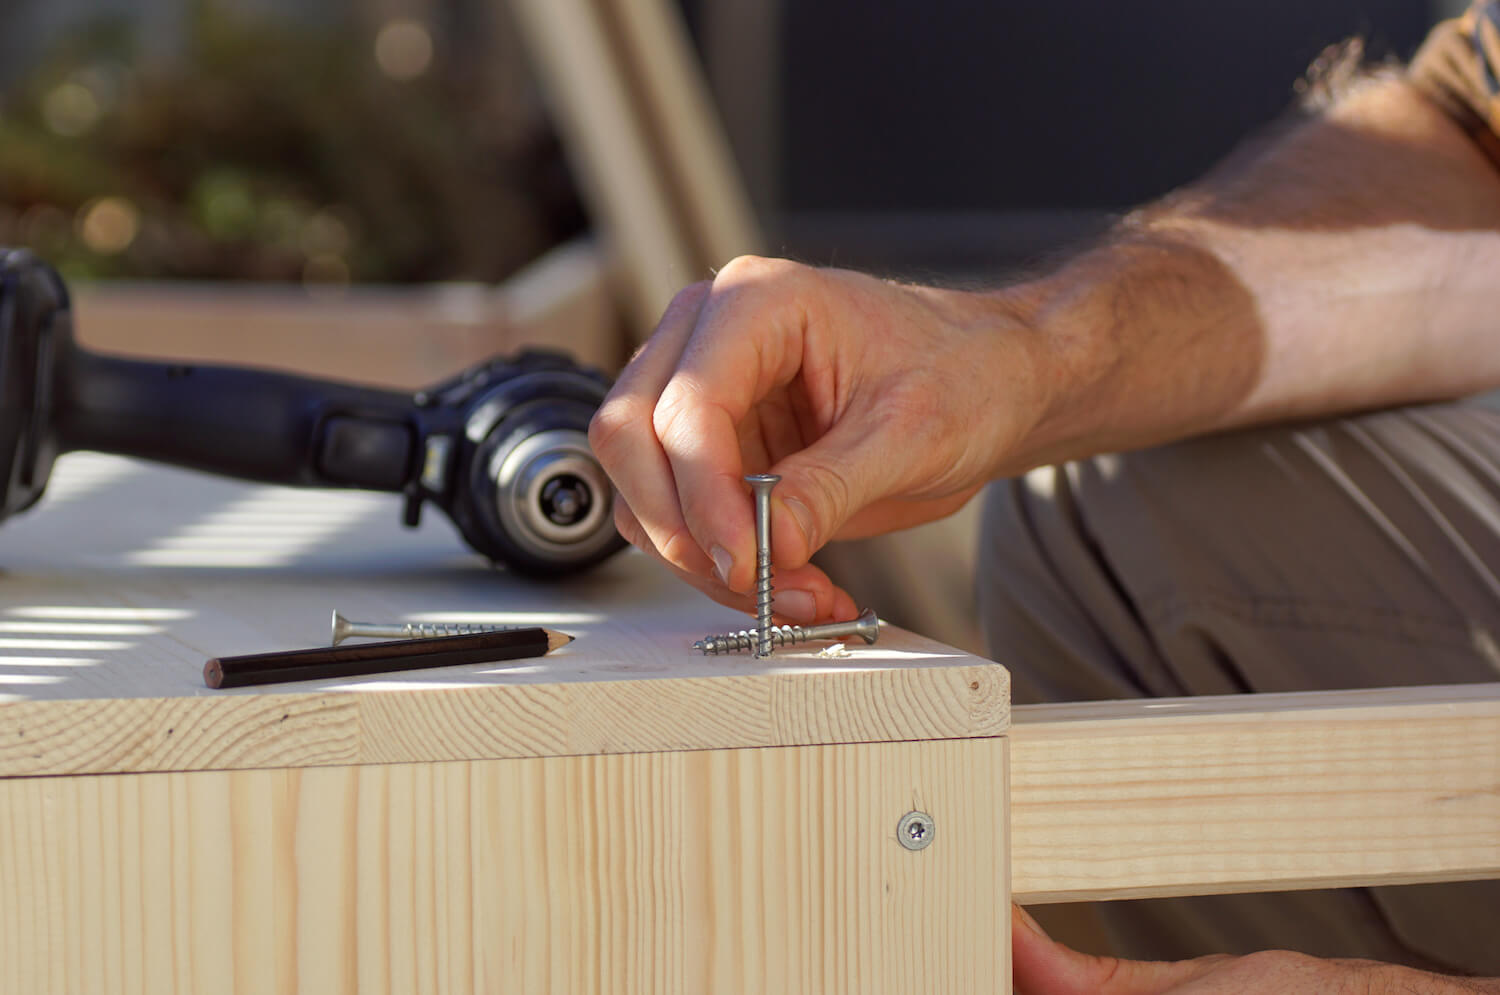
After checking out a lot of videos (see the links at the bottom of the post), I chose the project below. It’s a basic box with a ledge inside to support the floor of the box and legs made out of two 1-by-4 inch boards each. (The V-style leg.) To build the box, you need four 1-by-6 by 8 foot boards, each of which is cut to give you one piece 36 inches long and one piece 16 1/2 inches long. The remainder of the lumber is used for the floor of the box. You also need three 1-by-4 inch by 8 foot boards cut into 30 inch pieces for the legs. (Again, there will leftovers.) Finally, you need two 1-by-2 by 8 foot boards for the ledge that holds up the floor slats and the decorative trim on the box.
Most projects recommend buying cedar or cedar fencing because it wears well outside. I chose pine for cost reasons and because I plan to paint the exterior of the box. I also had the boards cut at the store because I do not own a chop saw.
Per instructions in the video, I built two basic boxes, one of which had a ledge on the long sides to hold the bottom slats, making attachments with 1 1/4 inch deck screws and a bit of wood glue. After both boxes were made, I formed the legs and fitted the top box inside the legs and screwed it together.
Then my problems started.
When I tried to slide the bottom box inside the legs, it did not fit. The boards were slightly wonky and one side was just a hair too long. Lesson: Measure and cut carefully. After taking a break, I realized I could just take the ill-fitting box apart and attach each side inside the legs individually. I replaced the too-long board with a different board and everything was attached without a problem. I then cut some of the leftover wood to place across the ledge for the floor of the box. In the video, they use an electric nail gun to attach these, but I don’t have one of those, so I used wood glue. Since it’s going to be filled with dirt, I think that will work. Lastly, I added the trim, using nails.
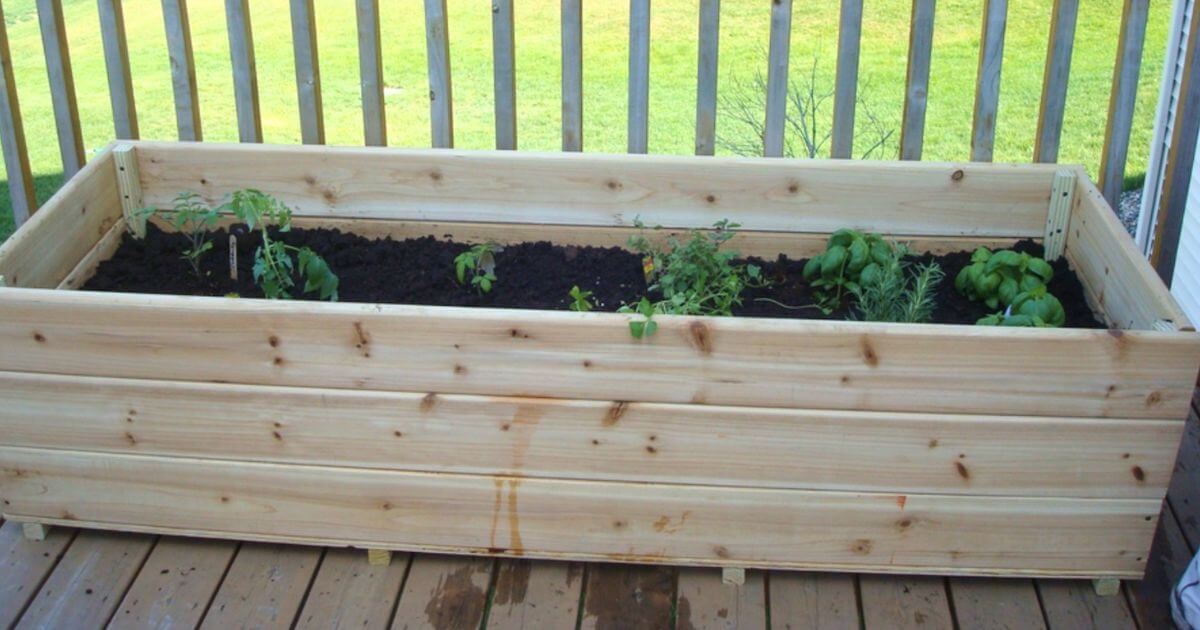
My box is decidedly not perfect, but it will work and I think the paint will cover a multitude of flaws. Most of the time these boxes are left unpainted. I’ll paint the outside only so as not to contaminate soil in the box and then add a plastic liner to the inside of the box with drainage holes. I did this when making this double-decker garden bed and it has worked really well. That bed is going into its fourth season with few signs of wear.
So Many Boxes
I haven’t finished my second raised bed on legs yet, but plan to do it using the post leg method rather than the V-shaped leg. Both boxes will be about 10 inches deep and 30 inches tall. They’ll be used to grow herbs, greens and maybe some trailing flowers, such as nasturtiums.
Below are four videos that show a variety of projects for a variety of skill levels from ones for those without power tools to one for a wood-working expert. I hope you find a box you’d like to make and one that will look great in your garden. Making garden boxes is a fun project for the end of winter.
For the Gardener with Minimal Tools
This box is easy to make. If you don’t want to add the self-watering features, just put more slats across the bottom, add landscape fabric and soil.
Simple Project for the Person with a Few More Tools
This is a quick video showing how to make a simple raised garden box with a hardware cloth bottom. Not glamorous, but functional.
A V-Leg Project with a Lower Shelf
I really like the looks of this project and the video features very clear instructions and a tip on how to get dings out of your wood. Also, I love that he makes a mistake in the video and owns up to it!
This Old House Planter Box
If you’ve got all the tools and the skills of Tom Silva, this is the one for you!

Mary Lahr Schier is a Minnesota gardener, writer and editor and author of The Northern Gardener, From Apples to Zinnias, 150 Years of Garden Wisdom (Minnesota Historical Society Press, 2017), winner of the Silver Award of Merit from GardenComm in 2018. For 18 years, she edited Northern Gardener magazine, the publication of the Minnesota Horticultural Society and the only magazine dedicated to gardening in USDA Zones 3, 4 and 5.

Great blog post! Honestly learned alot about the gardening niche from you guys!
I was reading that landscape cloth is full of plastics and chemicals. I think I will just fill it with garden soil and peat moss and grow my vegetables.