
Building Raised Bed Gardens: Two Basic Options
Raised bed gardening is a great way to grow food or flowers, whether you live on a large lot or have only a balcony or deck for gardening. We’ve gotten many questions about how to build raised bed gardens. The good news is, it’s really easy (trust me, I’m not mechanical and I’ve built a bunch of them) and you only need a few tools. This is the first of two posts on building raised beds. You can also find dozens of styles and ideas for raised beds on YouTube.
Why Raised Beds?
If you have a space on the ground where you want a raised bed, building a basic box with no bottom is the easiest type of raised bed to make. Why would you create raised bed gardens if you have space in the ground? One reason is to control the soil. With raised beds you add a soil mix of your choice to the garden-or you can use the lasagna method to cover up poor or weed-filled soil with a garden box. There are aesthetic reasons for raised bed gardens, too. The garden boxes give your vegetable area a defined look. If you put more than one box out, it can be decorative with paths between the beds and maybe a fence around the garden. Because of the improved soil, raised beds are more productive and the wood gives you something to attach chicken wire or other fencing to in order to keep out critters.
The Really Basic Box
Building the basic box is simple. For the bed shown below, I bought three 2-by-10 inch boards, about 10 feet long, and three 2-by-4 inch boards of the same length. The guys at the lumber yard cut one of each width of board in half, so I ended up with two short boards (5 feet) and two long boards (10 feet) of each type. To build the box, I measured and drilled pilot holes for each point of connection. (Drilling pilot holes is the key to getting things together fast.) Then, using deck screws, I attached the boards to each other. When the basic box was together, I added some 2-by-4s I had around as corner bracing pieces. It doesn’t show in the photo but I later added more bracing pieces in the middle of the box for extra stability because it’s a pretty big box. These pieces are taller than the box (in the photo, the box is upside down) and they act as posts anchoring the box in the ground. When you put the box in the garden, dig holes for the posts, drop the box in and fill around it to get it level.

The whole job took less than two hours. You can use narrower 1-by boards, if you’d like and you can customize the size of your box to whatever your space allows. The basic boxes I have in my current garden are 4 feet by 4 feet and stand about 20 inches tall.
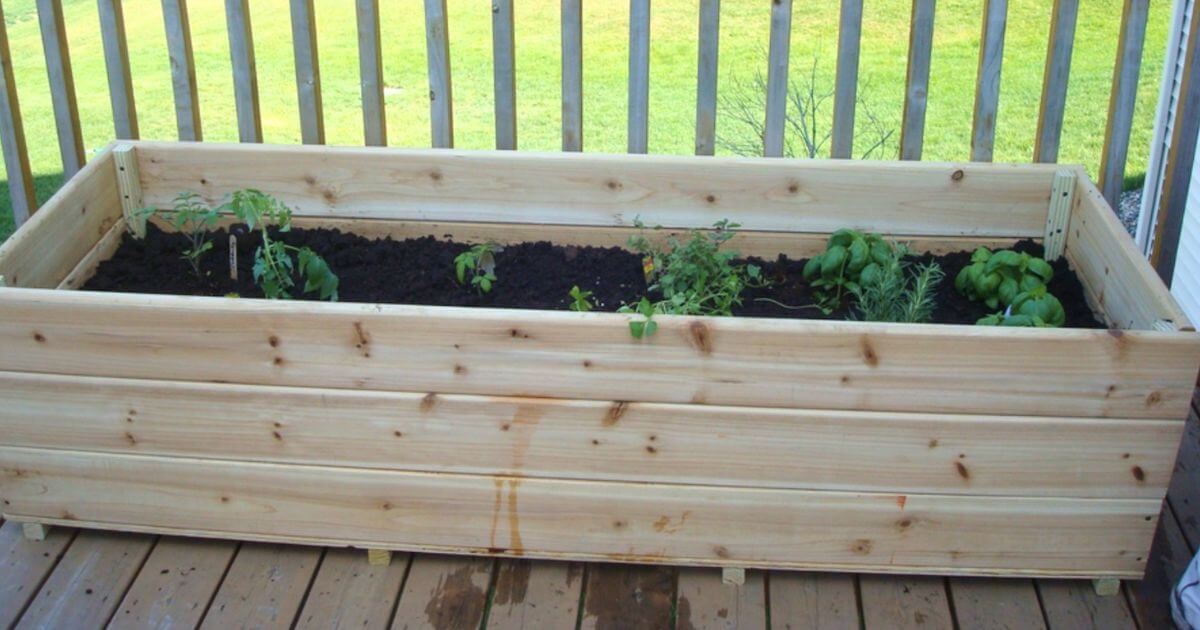
The Deck Side Garden Box
Building a garden box for your deck (pictured at the top of the post) is similar to building the basic box, except you add a bottom to it and some slats below the bottom to keep the box off of the deck. In this example, the homeowner purchased six 1-by-8-by-8-foot-long cedar boards for the sides, two 2-by-2-by-8 foot boards for the inside and bottom support pieces and a piece of plywood for the bottom.
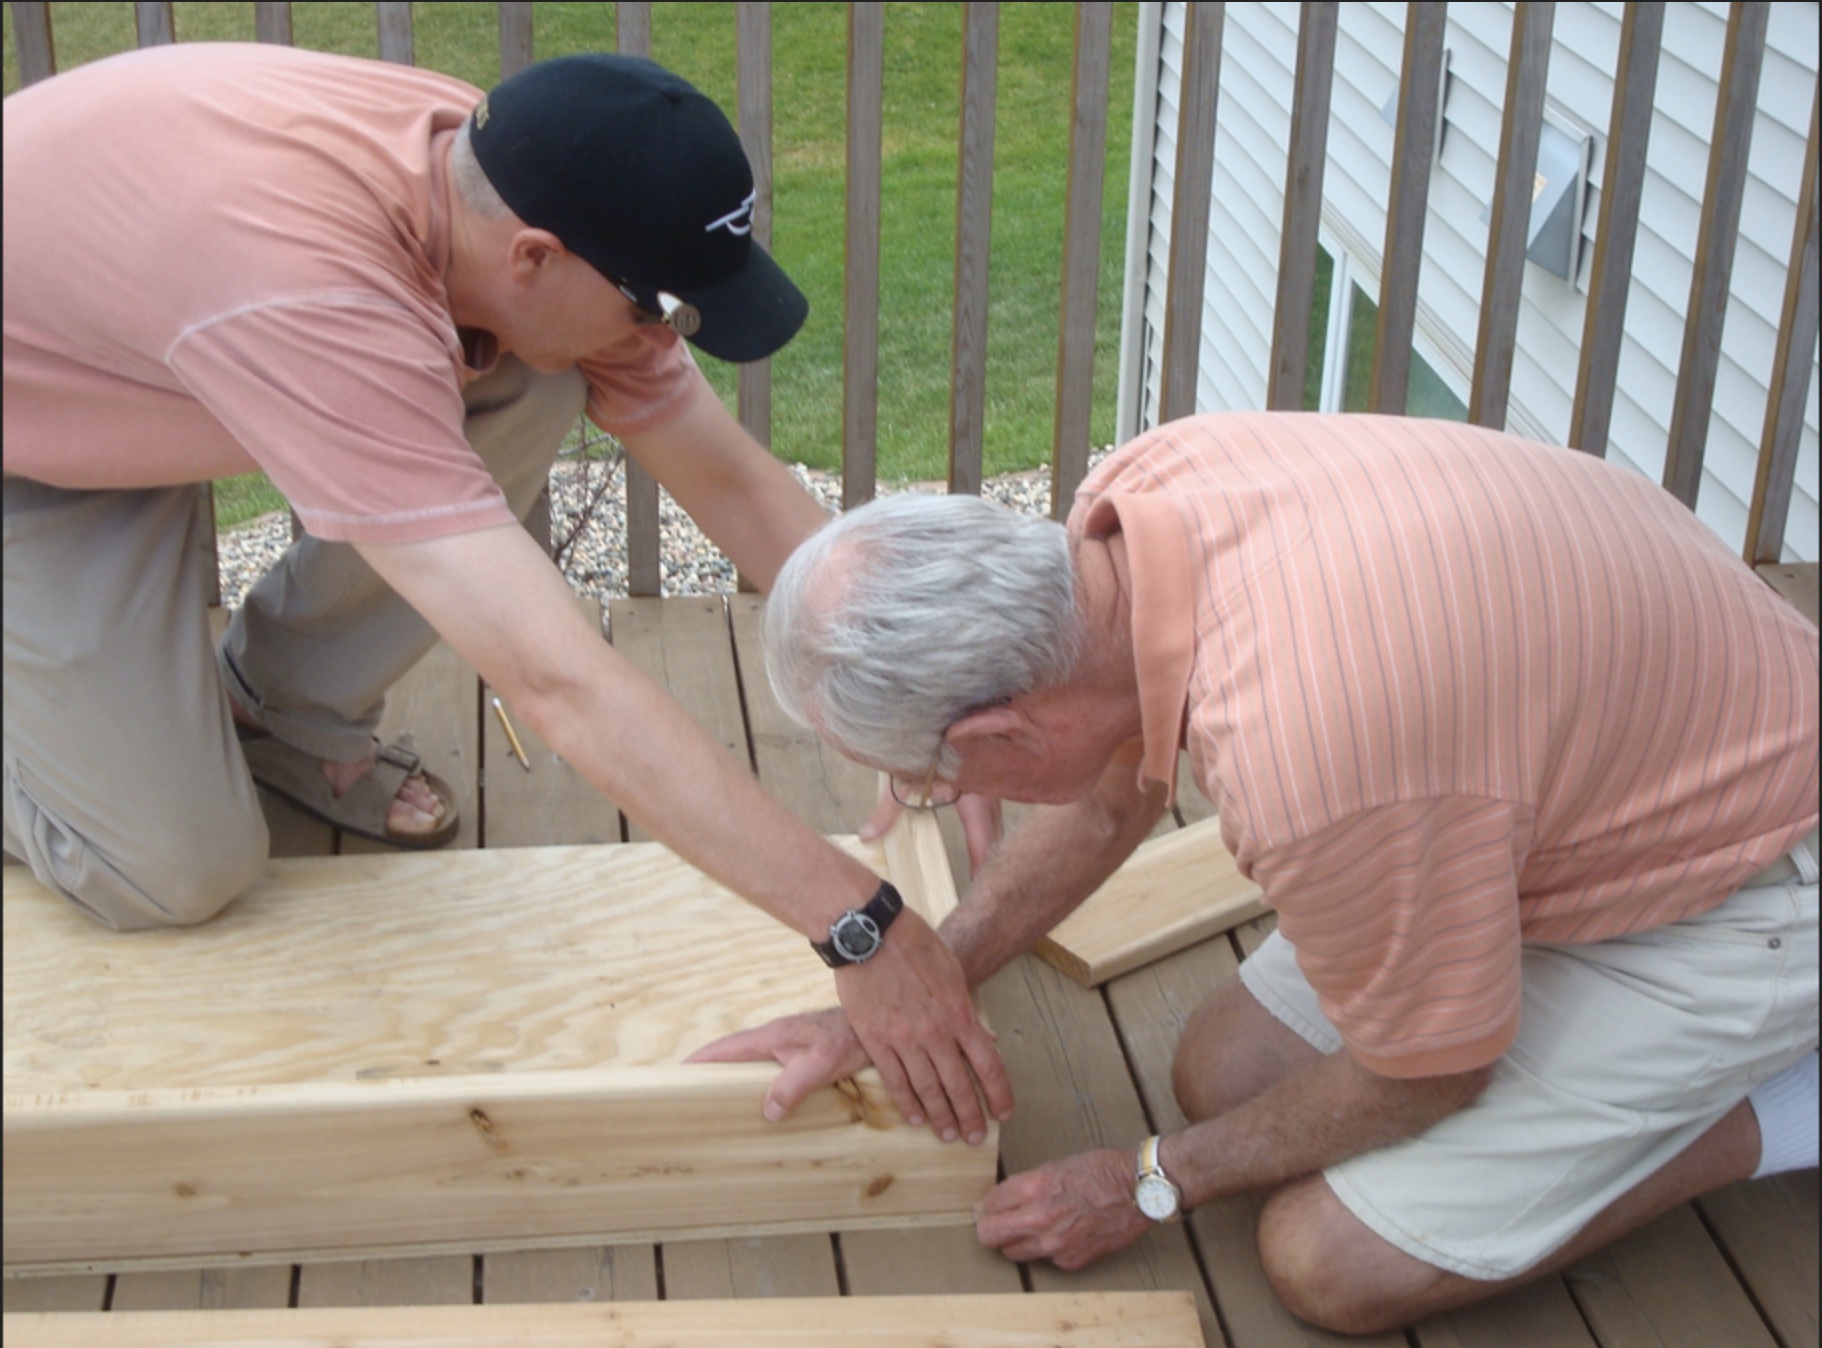
He cut each of the 1-by-8 boards into a 2-foot length and a 6 foot-length. He cut each of the 2-by-2s into four lengths-the ones inside the box are about 16 inches each and the ones below the box are about 22 inches each.
Using wood glue, he formed two of the 6 foot pieces and two of the 2 foot lengths into a basic box (above). He did this on top of his plywood piece to make sure they fit properly and were level. He put supports inside each corner of the box and screwed the boards to the support pieces (below). To build the other two box layers, he added the sides on top of each other, attaching the side pieces to each other and to the supports using deck screws. As you can see, he had a helper, which really makes the job much easier. The final box is about 16 inches deep.


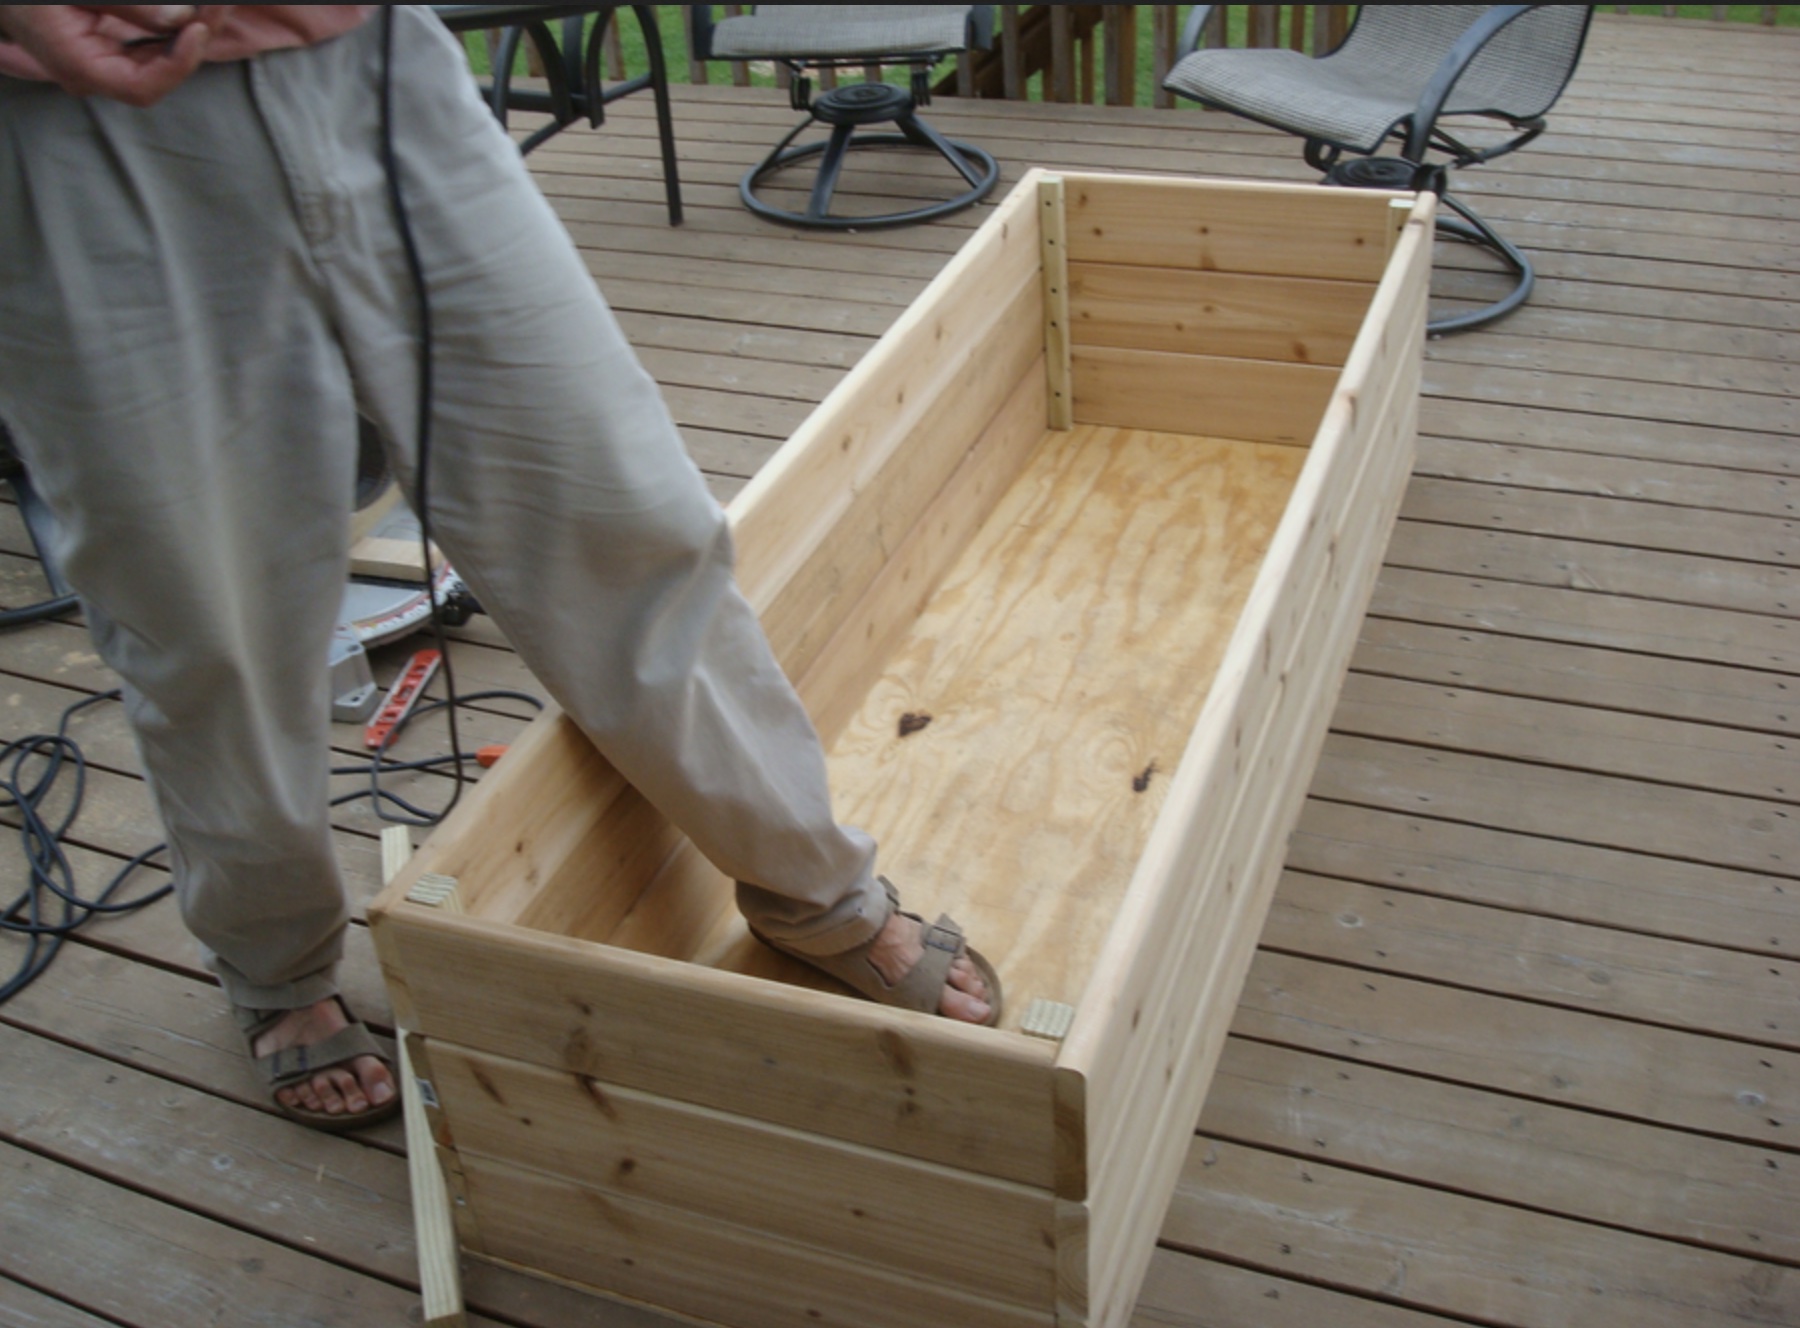

After completing the box, the homeowner attached the plywood to the bottom with deck screws and then attached four strips of 2-by-2 lumber to the bottom to keep the box off the deck. He also drilled several holes in the bottom to allow drainage and stapled landscape fabric to the bottom of box to hold in soil. Because this box is made of cedar, it will last a long time.
If you’d like a double decker deck or patio garden, try this project from Garden Answer. I made it several years ago and it adds some height and a productive place to grow herbs to my patio. It looks good, too, even after several years on the patio.
Want to learn more? Check out our blog post on how to build a raised bed with legs.
Mary Lahr Schier is a Minnesota-based garden writer.
You may be interested in:
Building a Raised Bed with Legs
The previous post discussed a couple of ways to build a basic raised bed garden, for your deck or on the ground. In this post,…
Day 3: Pots vs. Raised Beds vs. Traditional Beds
Some people are faced with a dilemma when planning their vegetable garden: should they plant their garden in the ground, or in raised beds, or…
Northern Gardener Earns Two Awards from Garden Writers Group
Two articles from 2017 issues of Northern Gardener magazine won Silver Awards in the annual media awards sponsored by GWA: The Association for Garden Communicators,…