

Ask a Master Gardener: Soil Sprouts
Happy New Year! I hope your holiday celebrations were as jolly and stress-free as possible. Now that the distractions of December have passed, I’m pretty much ready to start gardening again. Unfortunately, I have a long time to wait before the snow melts. So, what to do while waiting? How about trying some indoor gardening?
Question: What’s the best way to grow sprouts indoors during the winter?
Answer: There is no best way! There are several methods and each of them works great. The right answer is: whatever appeals to you and seems most achievable.
The term soil sprouts was coined by Peter Burke, whose book Year-Round Indoor Salad Gardening has been around for a few years. The book is extensive, exhaustive, and at times amazing-Burke is REALLY into his soil sprouts method.
The primary benefit of this method over microgreens is that you get to harvest a little faster-about 6-7 days-and it’s mostly hands-off. Here’s how it works.
First, gather your materials.
You’ll need seed starting soil mix and seeds such as snap peas, sunflower seeds, radishes, and any brassicas. Burke’s soil recipe also calls for adding liquid or dry kelp (I use Neptune’s Harvest) and compost.
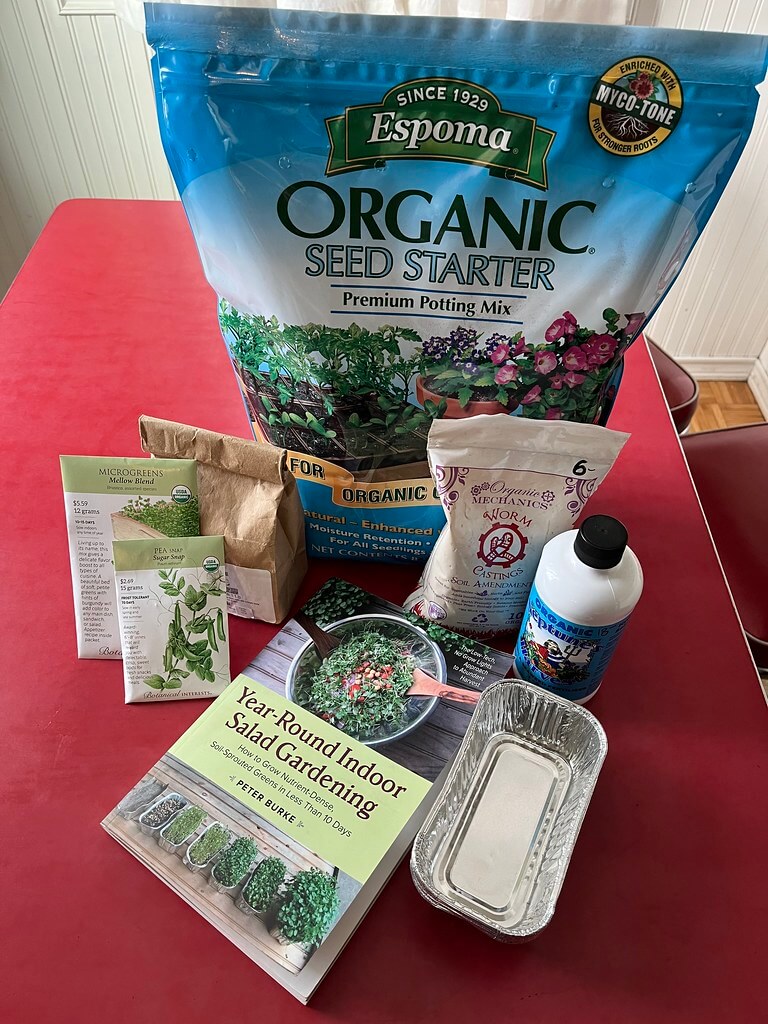
I substituted purchased worm castings for compost this time because it’s a challenging time of the year to procure compost in Minnesota. Finally, containers for your sprouts: I like these mini loaf pans that Burke recommends. They can be used several times before they need to be replaced, and they fit nicely on a windowsill.
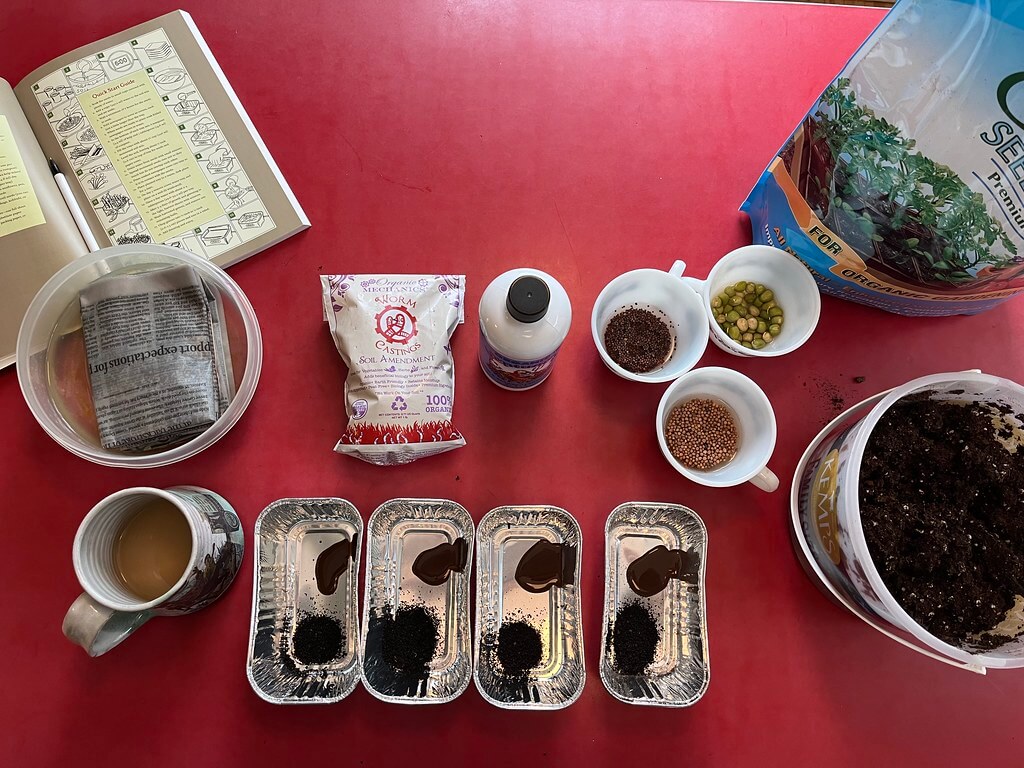
Soak your seeds overnight.
For each mini loaf pan you need about 1 teaspoon of smaller seeds such as broccoli or kale, and about 1 tablespoon of larger-size seeds such as radish or peas. The next morning, fold some newspapers into roughly the size and shape of your container. Soak them in water. Prepare your soil by moistening it in a bucket. This way you can ensure you have just the right amount of soil and water-moist but not wet.
Add about ½ teaspoon of liquid kelp and 1 tablespoon of compost or worm castings to the bottom of each container. Add the moistened potting soil on top, stirring it in a little bit, but don’t worry about fully incorporating the add-ins. Fill each container to at least ¾ full.
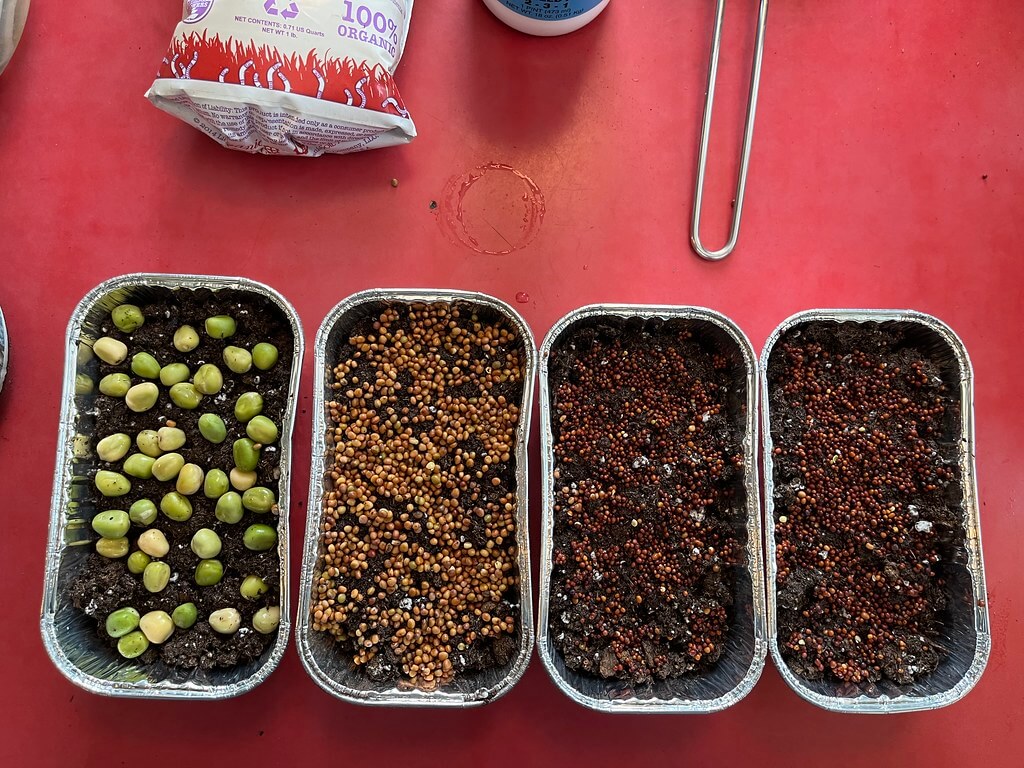
Planting your seeds.
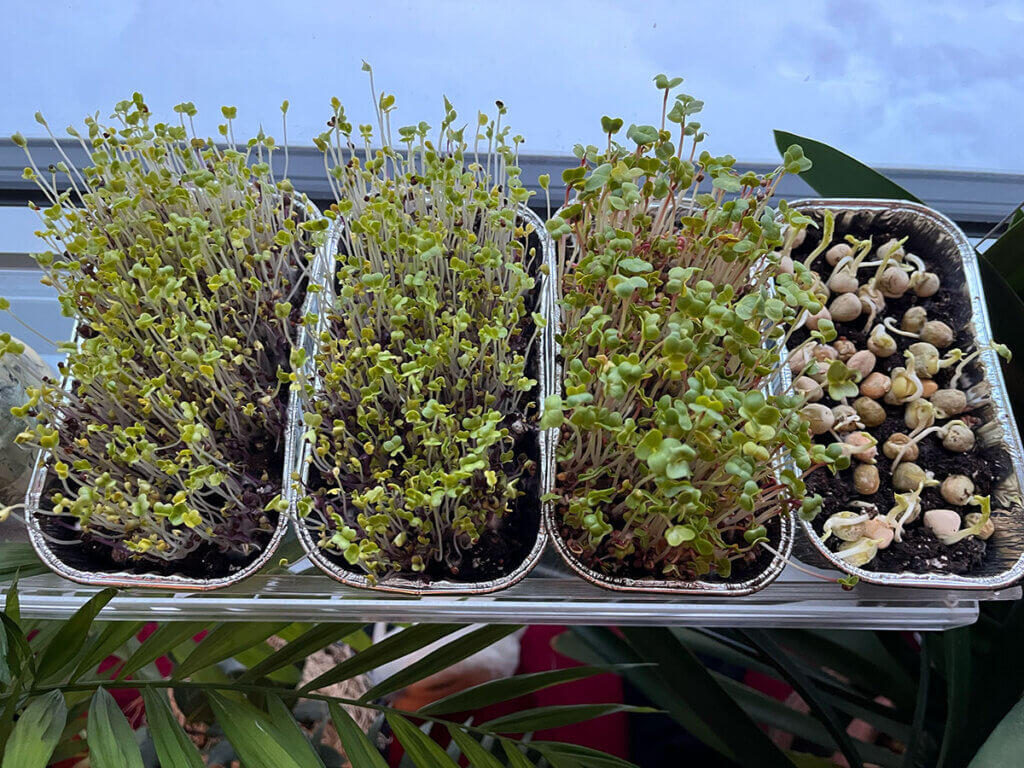
Gently press the seeds into the top of the soil. L to R: snap peas, radishes, and two pans of a brassica microgreen mix.
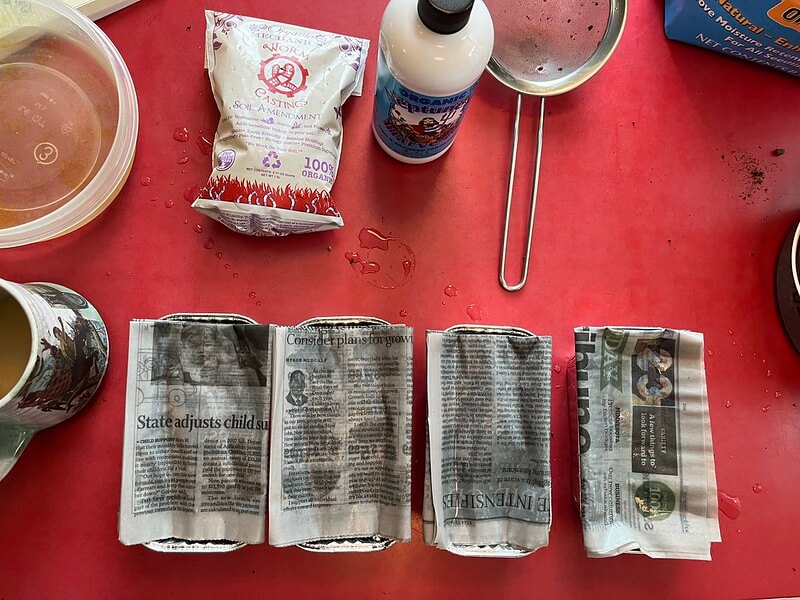
Gently press the wet folded newspapers on top of each loaf pan.
Where to stow your microgreen seeds.
Place in a warm, dark place. I happen to have a cupboard that is adjacent to a furnace vent and stays quite toasty. Perfect. Now the waiting game begins-wait 4 days. It might take longer if your cupboard is cooler. But start checking in four days. The purpose of keeping them in the dark at first is to trick the seedlings into stretching out tall, quickly, in search of light.

When to move your microgreen sprouts.
When your sprouts reach about two inches tall or so (no need to be exact), take them out and place them near a bright window. They don’t need direct sunlight. But wait, why are they yellow? Don’t worry! They will green up quickly. If they seem dry, give each loaf pan a tablespoon or two of water.

Harvesting your microgreens.
As soon as they’re green, they’re ready to harvest. It usually takes about one day. I snip mine with a kitchen shears. As you can see, this time my snap pea shoots are taking a little longer to get going, so I’ll give them several more days. If you don’t harvest right away, you may need to water a small amount each day until you do. After harvest, the root balls from the sprouts can be placed in your compost bin and you’re ready to start over.
No matter which method you choose, microgreens and sprouts are a fun and nutritious way to scratch your gardening itch in the winter. Try a few methods and see which is your favorite!
More resources from the Master Gardeners
Do you have more gardening questions? Ask them in the comments below! We’ll check in and answer as many questions as we can for the rest of this week. If we don’t get to yours, you can Ask a Master Gardener via our online form, or call the Yard and Garden Line at (612) 301-7590.
Other helpful resources:
- Yard & Garden Home
- What’s wrong with my plant?
- What insect is this?
- The Master Gardener Volunteer Program
Jennifer Rensenbrink is a University of Minnesota Extension Master Gardener Volunteer for Hennepin County. She somehow has two mini-prairies on her tiny south Minneapolis property.
You may be interested in:
Ask a Master Gardener: Veggie Garden Clean Up
Ask a Master Gardener: Prairie Garden Planning
It must be garden planning season because two different people recently asked me variations of this question. Let’s dig in. Question: I’d really like to…
Growth and Generosity at the Spring Garden Gala
The Spring Garden Gala moved from Lake Elmo to the more expansive Vadnais Heights Commons in 2025 to account for a growing desire of area…